Description
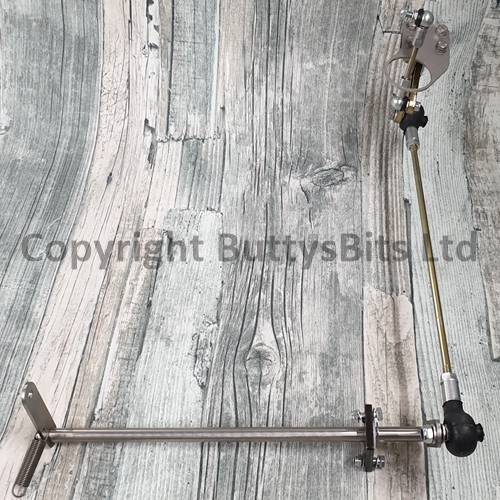
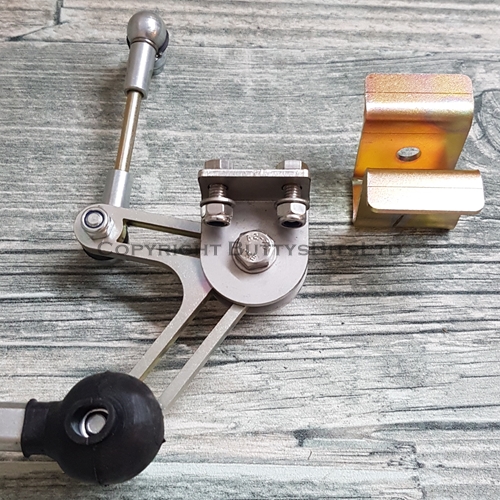
This part of the kit is the main wear area on 1969-1972 buses, the kit mounts to the throttle pedal then goes down through the cab floor to the main swivel section, these kits have sealed roller bearings that allow everything to rotate nice and smoothly. Kit also has a double ended rose joint rod that if you feel needs adjusting you can.
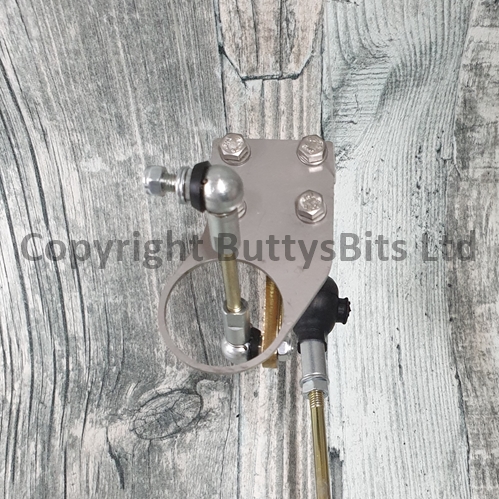
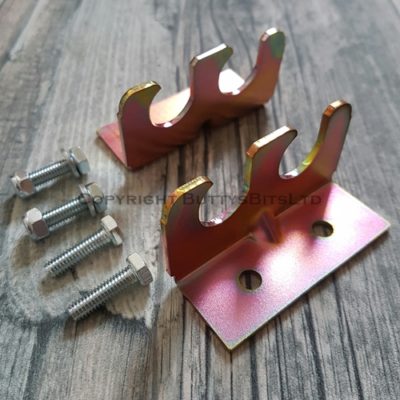
The kit has recently been uprated with a NEW stainless steel top hat section (Thats the part that is usually welded to your floor that the kit bolts to ) These come as standard with every kit , you will need to remove the original steel mount then bolt this stainless mount up in its place . Comes with 4 stainless steel bolts nuts and washers .(Just make sure when bolting up , the pushrod from the pedal is centered in the hole in the floor)
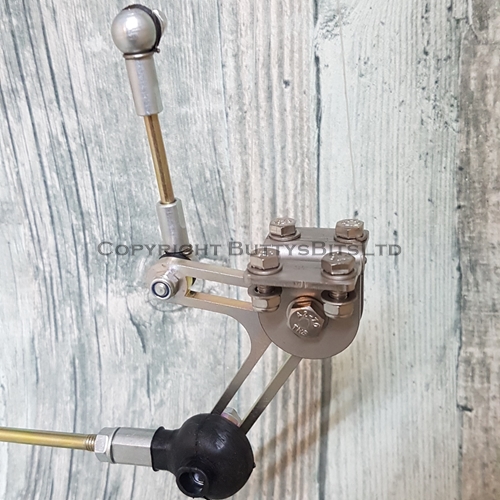
Also these joints are encased inside a rubber boot to keep all of the crud and dirt out as your front wheel is situated right behind the joint. (Also makes it easier to squirt a bit of lubricant in there from time to time )
Plus there is now a small thin spanner included in the kit, to be used when fitting the small balljoint to the throttle pedal (doesn’t seem much but an absolute time saver, believe us).
I now sell this in 2 options , linkage only , and linkage and through shaft .
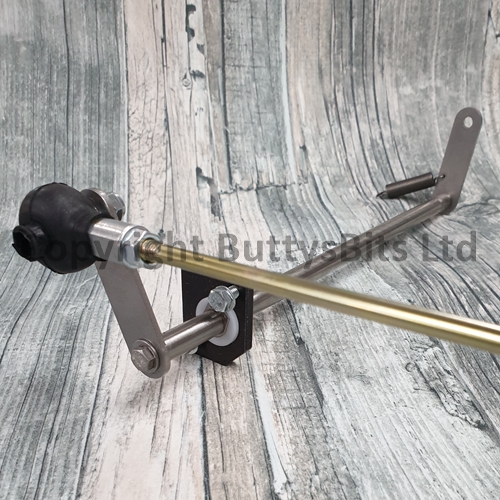
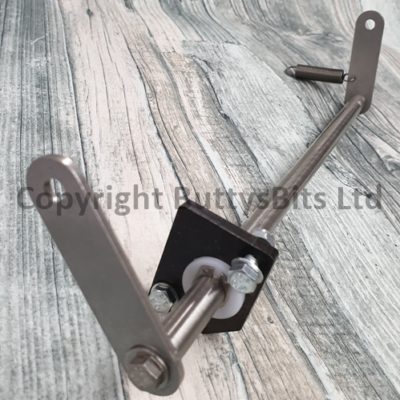
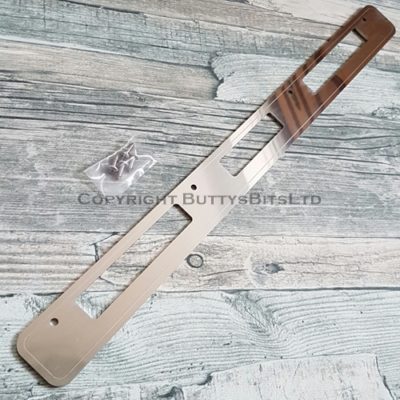
Complete kit this is the 2 main parts of the linkage itself , you get the through shaft and bearing carrier itself . So it is everything from under the pedal to where the cable connects .
or
Just the linkage section from under the pedal to where the long rod connects to the through shaft .Fixes most of the worn parts .
All down to how worn your linkage sections are .
Parts That Come with this Kit
- Main kit itself
- New stainless steel top hat section plus mounting kit (You need to remove the old pivot section and bolt this one on)
- Rubber joint boots come pre fitted
- Tiny spanner (To help fitting pushrod to the pedal)
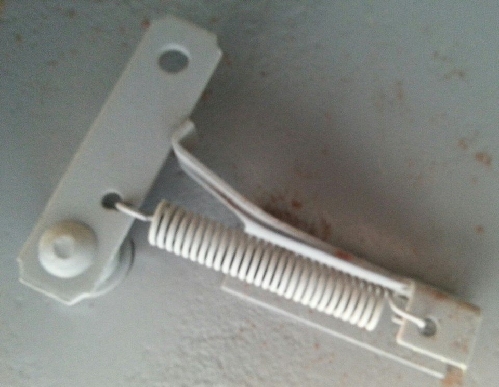
- New return spring that replaces the original (fits just below where the throttle cable hooks up , see image)
Below is a little list of “How to fit” Use this as a guide .
Ok to start with remove everything from under the pedal to where the cable hooks up next to the chassis rail and brake master cylinder area , you will also need to remove the pivot section / top hat that is welded to the underside of your floor , if its been replaced in the past very often people just bolt the replacement on .
So now you have a cleared out under floor area .
In the small bag of bits you will find a plate with 1 large hole in it and 4 small holes you need this to drill new holes to mount the new swivel section /top hat onto your floor , lay the plate on the inside of the cab area so the big hole is over the big floor hole with the small holes towards the front of the van and as looking down they should go off to the right . This plate should lay parallel to any floor pressing , then drill through the plate or mark centres and drill 4 x 5mm holes , then you can bolt up the main pivot section , some people keep the plate in place and some just use it to drill the holes only .
Bolt the main pivot up and as you do so guide the short rod up through the large hole in the floor , this if the holes have been drilled correctly should be dead centr of the hole (This is the reason for removing the old mount , it is to ensure the rod through the floor runs central . )
Bolt the short rod to your pedal using the small thin spanner in the bag of bits , this spanner is used for holding the tiny thin nut just next to the joint rubber , then you can do the nut up from the other side .
That is the front section sorted .
Let the long rod dangle down
Next is to remove the endplate furthest away from the bearing , it should be just a nut that is finger tight . Remove the plate and the stainless spacer and slide the shaft in from the outside , so that the bearing plate buts up against the steelwork that looks similar shape to the bearing carrier , again just mark through the holes and drill 2 x 5mm holes and bolt up , then add the inner spacer again and secure the endplate in place with the spring hole facing rearwards , hook spring into the small hole thats on the chassis rail and other end to the lever .
Then connect the long rod with the rubber boot onto the outer endplate . That then is the kit all fitted .
You may need to readjust your cable , hope this helps .